
How to create and deploy Python API in Docker?
TABLE OF CONTENTS
Share on Social Media
Related Blogs

How to implement Scatter Gather In Masstransit C#
Read More: How to implement Scatter Gather In Masstransit C#
What is Docker? How to Deploy and Install Redis in Docker
Read More: What is Docker? How to Deploy and Install Redis in Docker
Unlocking Business Success Online: Why Businesses Need The Best Digital Marketing Services in 2024
Read More: Unlocking Business Success Online: Why Businesses Need The Best Digital Marketing Services in 2024
Step-by-Step Guide to Using Azure Key Vault Secrets as Variables in Release Pipeline
Read More: Step-by-Step Guide to Using Azure Key Vault Secrets as Variables in Release Pipeline
In this article we will see how to create an API using python and how to deploy it on Docker. There are many articles on python, python APIs and Docker, but here in this article we have tried to describe an entire process from development to deployment in an easy way and step by step.
1. Create an API using python
For python, there are many options available to create APIs, such as Flask, Falcon, Starlette, FastAPI etc.
We will be using FastApi in this article for three reasons:
- We can create an API end-point with minimal code
- It is incredibly fast and its speed is on par with NodeJS and Go
- It automatically creates both OpenAPI (Swagger) and ReDoc documentation
We here will serve our FastAPI server with Uvicorn.
Uvicorn is the ASGI server that allows for asynchronous processes compared to the more traditional WSGI servers. This will speed up the application and brings us closer to production-performance.
Before we start creating our first Python API, make sure that Python and pip are already installed on our development system.
First, we need to install both FastAPI and Uvicorn and to install both, execute below commands in the terminal
pip install fastapi
pip install uvicorn
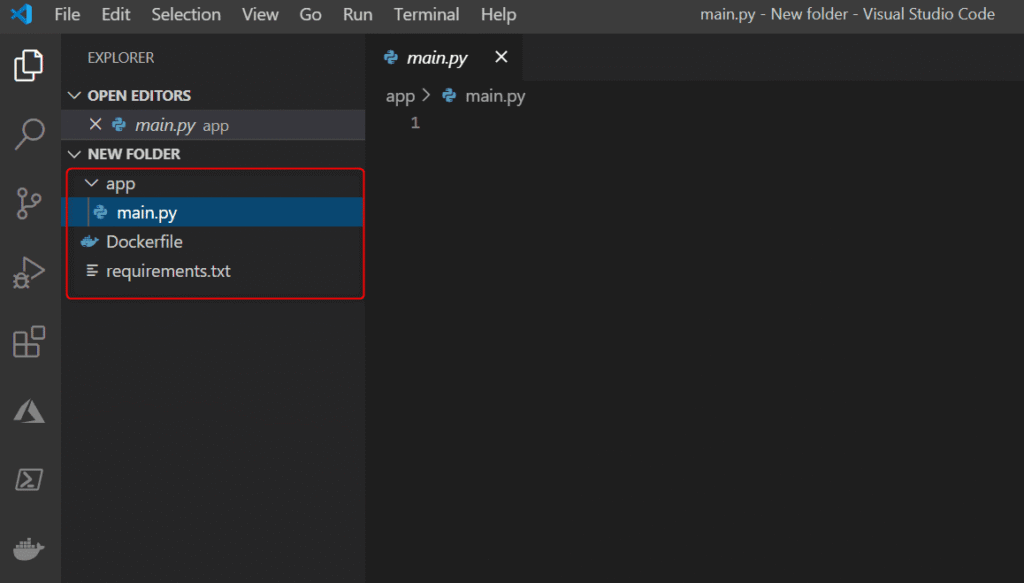
Now, create a file structure as shown below
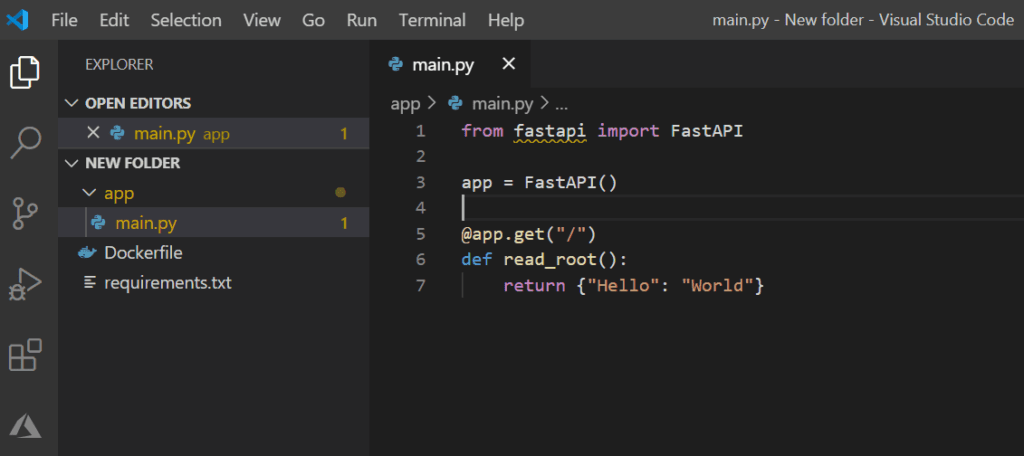
Now navigate to app > main.py file and add below code
Now in the terminal window, write below command
uvicorn main:app --reload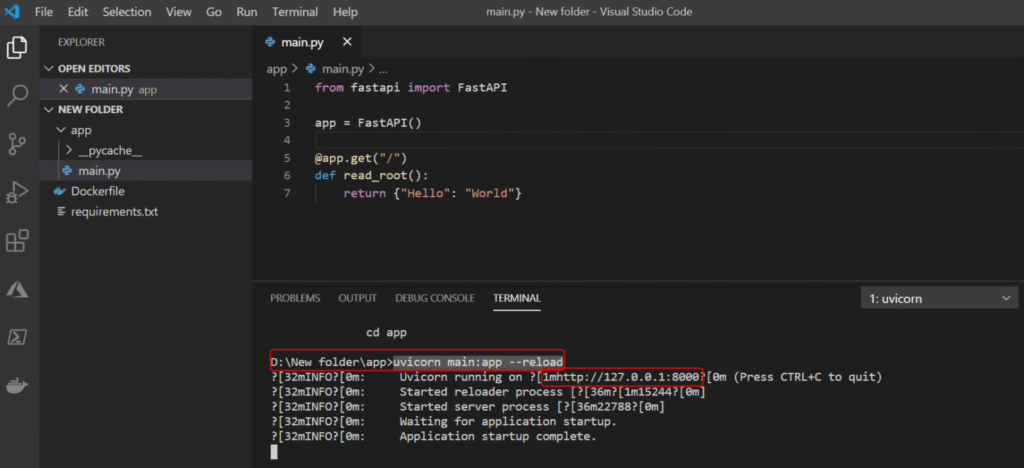
It will start our Fast API at the port 8000 by default.
After starting our FastAPI server, we can go to http://127.0.0.1:8000/docs to see the documentation of our server automatically generated. We can even press “try it” to see if the server works as intended.
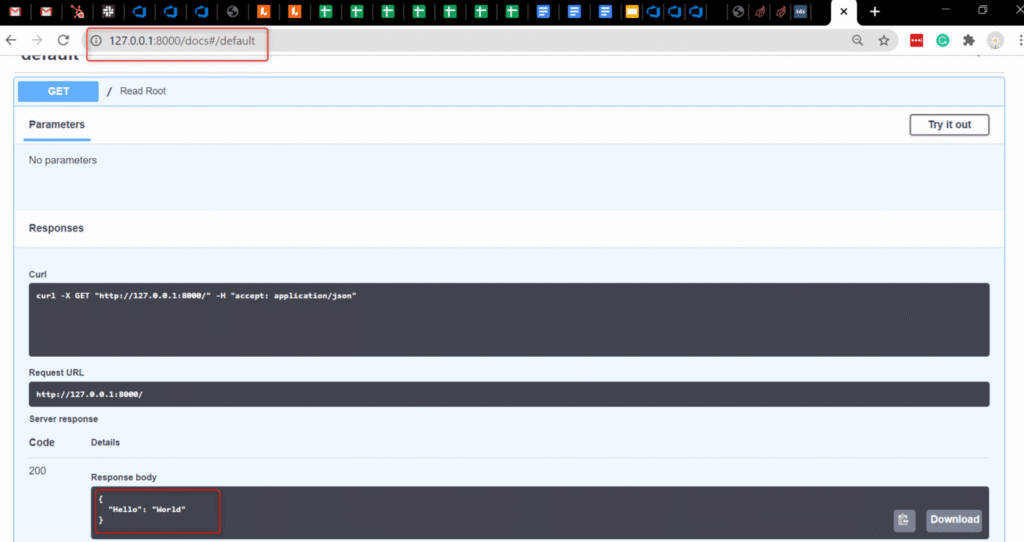
We can also get ReDoc using the link below.
http://127.0.0.1:8000/redoc
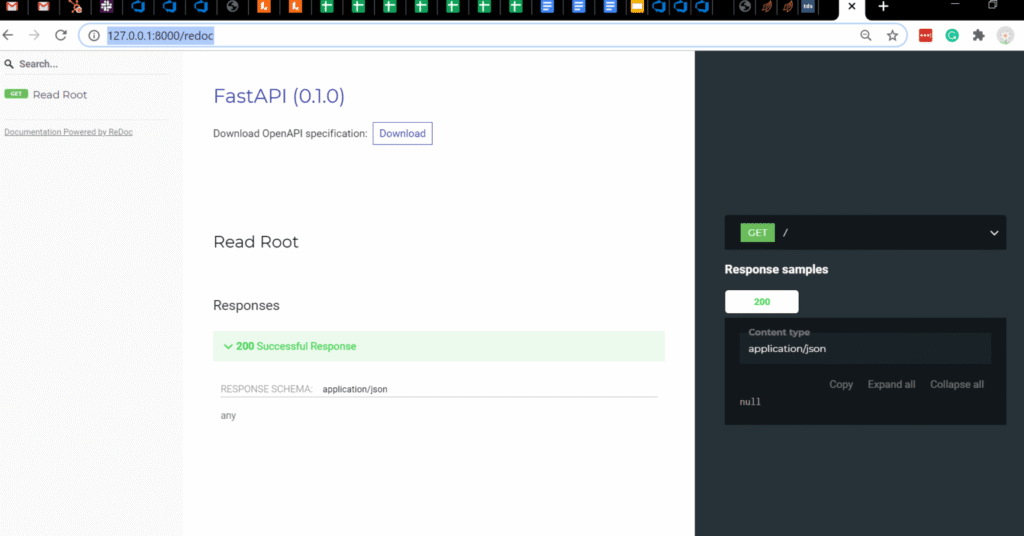
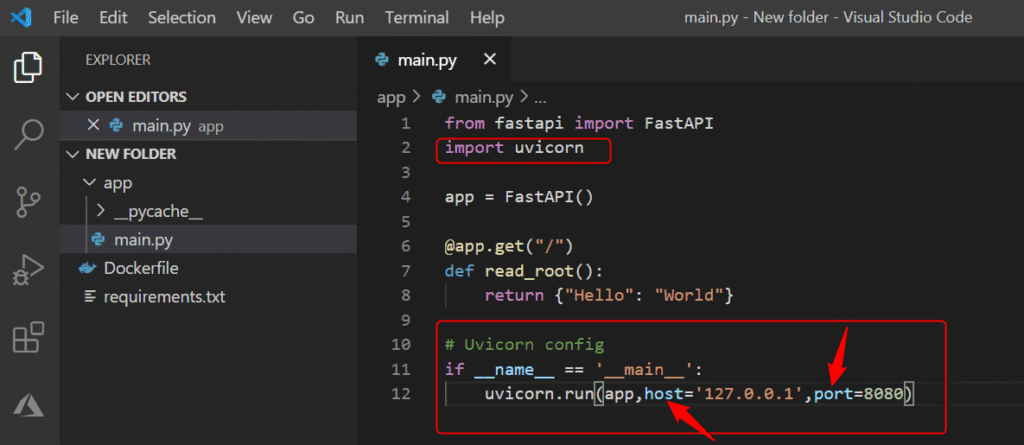
As I said, FastAPI is served at the port 8000 by default, but if we want to use any other port then we can update our code as shown below.
2. Deploy API using Docker
Now that we have an API to deploy we might want to containerize the application using Docker. Docker containerizes our app and all its dependencies to ensure it works seamlessly in any environment. This makes it easier to deploy your application across environments without much additional integration steps.
Start by making sure that we have Docker installed. Also specify a requirements.txt file for the application as shown below.
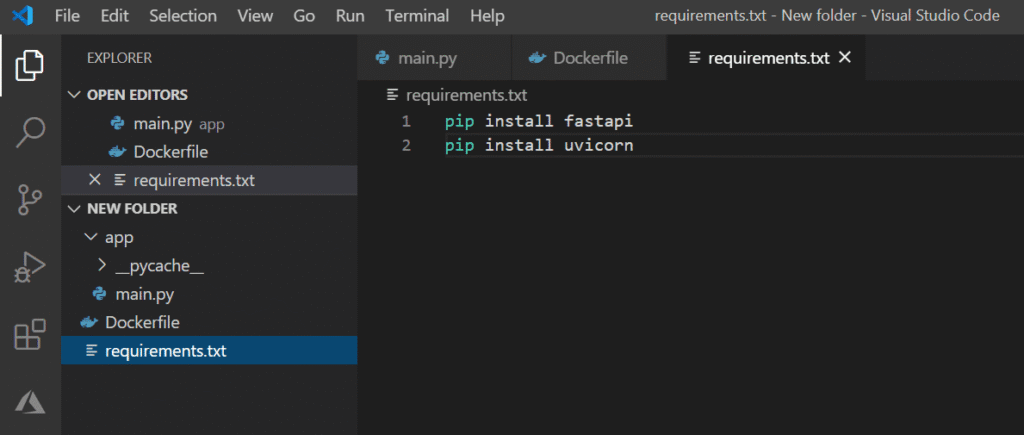
Next is creating the Dockerfile, which is needed to run a containerized version of our API. Fortunately, the developers of FastAPI have created python images that allow for proper environments to run FastAPI.
Here is what a Dockerfile will look like
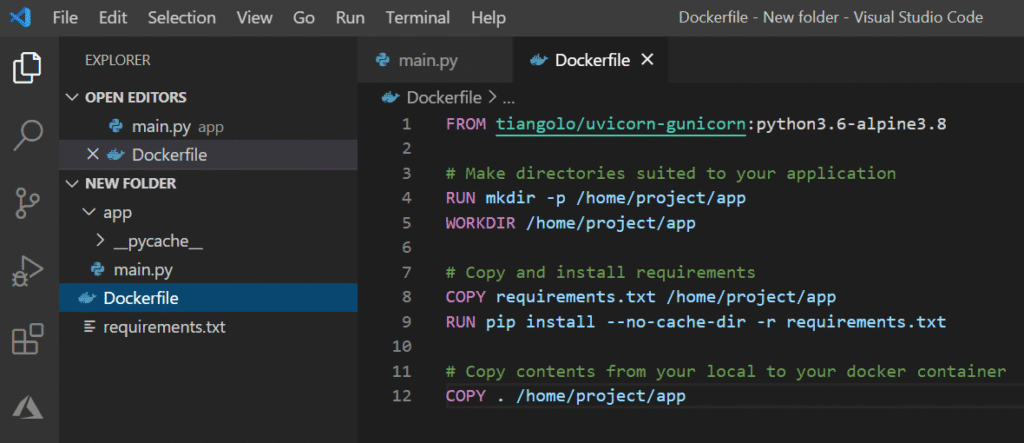
Save the code above in a Dockerfile and in the terminal navigate to the folder and run the following commands one by one:
docker build -t myimage ./
docker run -d --name mycontainer -p 80:80 myimage
Here, the first command will create an image of our FastAPI, this will build and run the image that we have specified in the Dockerfile.The second command will use the image which we have just created and will create a container of it.Our API is now ready and can be accessed from http://127.0.0.1/docs .
3. Conclusion
In this comprehensive guide, we have gone through step by step creating an API and containerizing the application. We can now choose to host it locally or deploy the Docker via cloud solutions such as AWS or Azure.
We have tried to make this article as simple as possible, hence we have only included subjects that we thought are important. Some more advanced topics have been excluded such as:
- Securing the API
- Routing and POST, PUT endpoints
- Configuring the Gunicorn/uvicorn server
- How to compose a Docker file in detail
- Creating separate Dockerfiles for different stages
- Using Kubeflow with Kubernetes to simplify production
Share on Social Media
Related Blogs
Mastering Azure Function Triggers: A Complete Guide with Real-World Examples
Read More: Mastering Azure Function Triggers: A Complete Guide with Real-World ExamplesWhat is Docker? How to Deploy and Install Redis in Docker
Read More: What is Docker? How to Deploy and Install Redis in DockerUnlocking Business Success Online: Why Businesses Need The Best Digital Marketing Services in 2024
Read More: Unlocking Business Success Online: Why Businesses Need The Best Digital Marketing Services in 2024
How to Use CTEs in MS SQL Server for Hierarchical Data and Query Optimization
Read More: How to Use CTEs in MS SQL Server for Hierarchical Data and Query OptimizationStay ahead of the curve
Get the latest insights, tutorials, and industry news delivered straight to your
inbox. Join 10,000+ developers and tech leaders.