Below diagram shows the overview of application example flow,

Prerequisites :
– An Azure DevOps account: Sign up for a free account if you don’t have one.
– Basic knowledge of git and docker.
– All the installation of docker and node for reactJS application.
1. Azure devops - ReactJS Project
- Create a new project in Azure DevOps and create a new git repository.
- After creating a new git repo clone that repo into the local system.
- Create a new sample reactJS project by using following command
npx create-react-app sample-app
- Push your all code to azure git repository
- Create a sample docker file which contains commands for create and build docker image and be able to run your project after successfully building docker image.
FROM node:10
WORKDIR /usr/src/app/my-app
COPY package*.json ./
RUN npm install
RUN npm build
COPY . .
EXPOSE 3000
CMD ["npm", "start"]
NOTE: If you don’t have knowledge about docker you can skip this step and later on while deployment and automation step you can cmd deployment and run all basic cmd commands into that.
- By completing above steps you have a ready repo of react application which can be used for auto deployment.
2. Azure Pipeline Setup
- Azure Pipeline is a powerful integration and continuous delivery (CI/CD) platform for Microsoft’s application development and delivery workflow. In this step, we’ll walk you through installing of Azure Pipeline Agent on a Windows machine. The agent will take on your development and deployment tasks, making you efficient in the software deployment process.
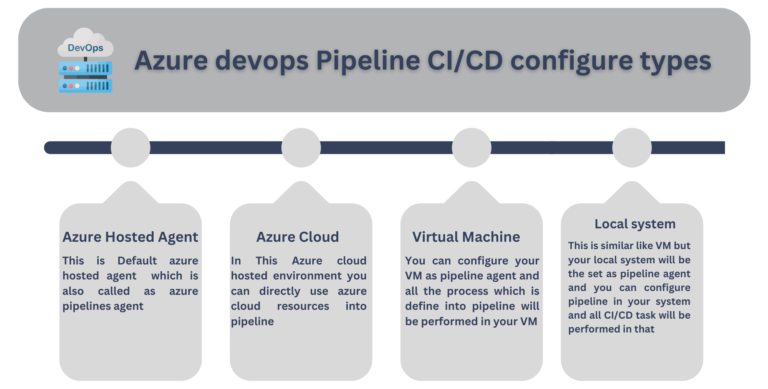
- To simplify and for better understanding, in this step, we will use a local system pipeline agent. Below are the steps to configure azure pipeline agent with the local system.
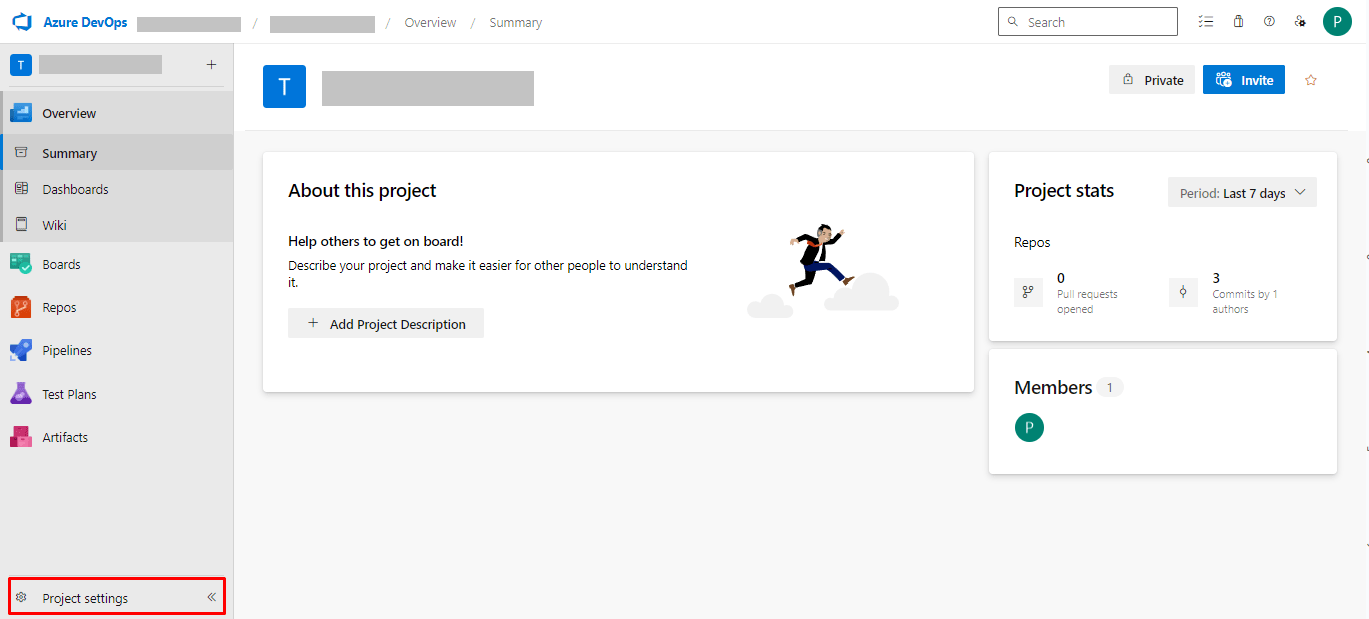
- STEP 1: Go to project settings and agent pools and click on ‘Add New’ Pool.
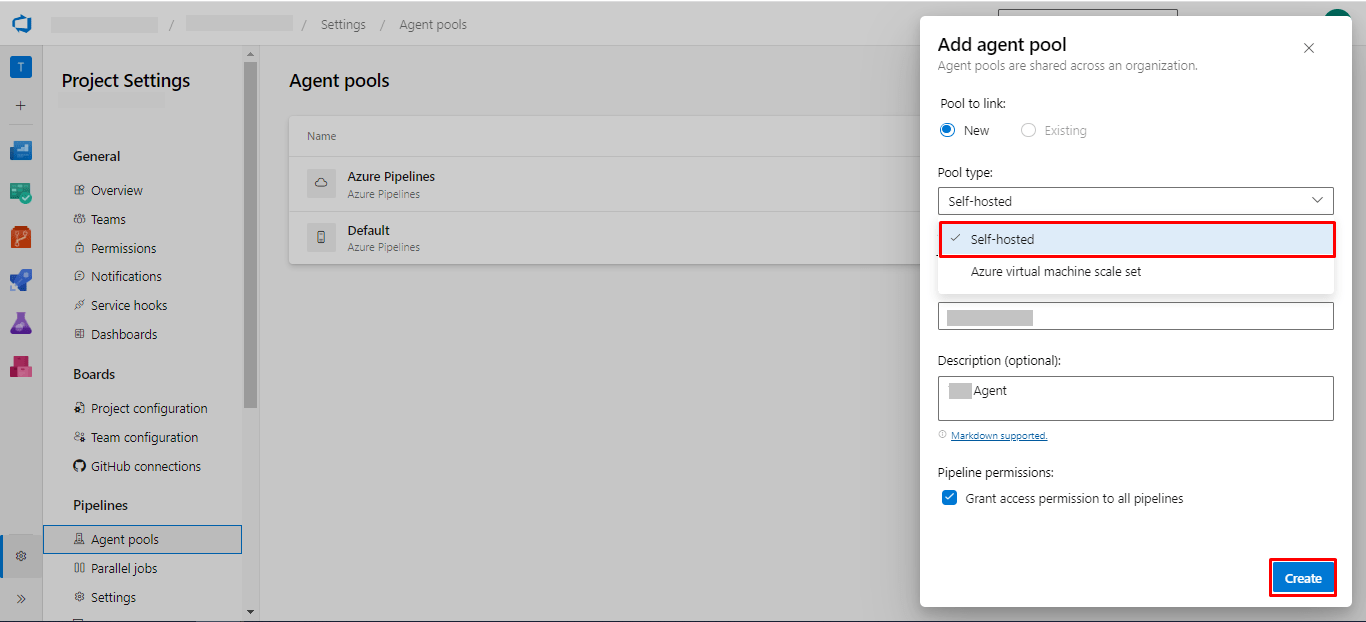
- STEP 2: After clicking on add agent pool it will open form and you have to select a new pool and select pool type as “Self-Hosted”, then provide name and description and grant all pipeline access.
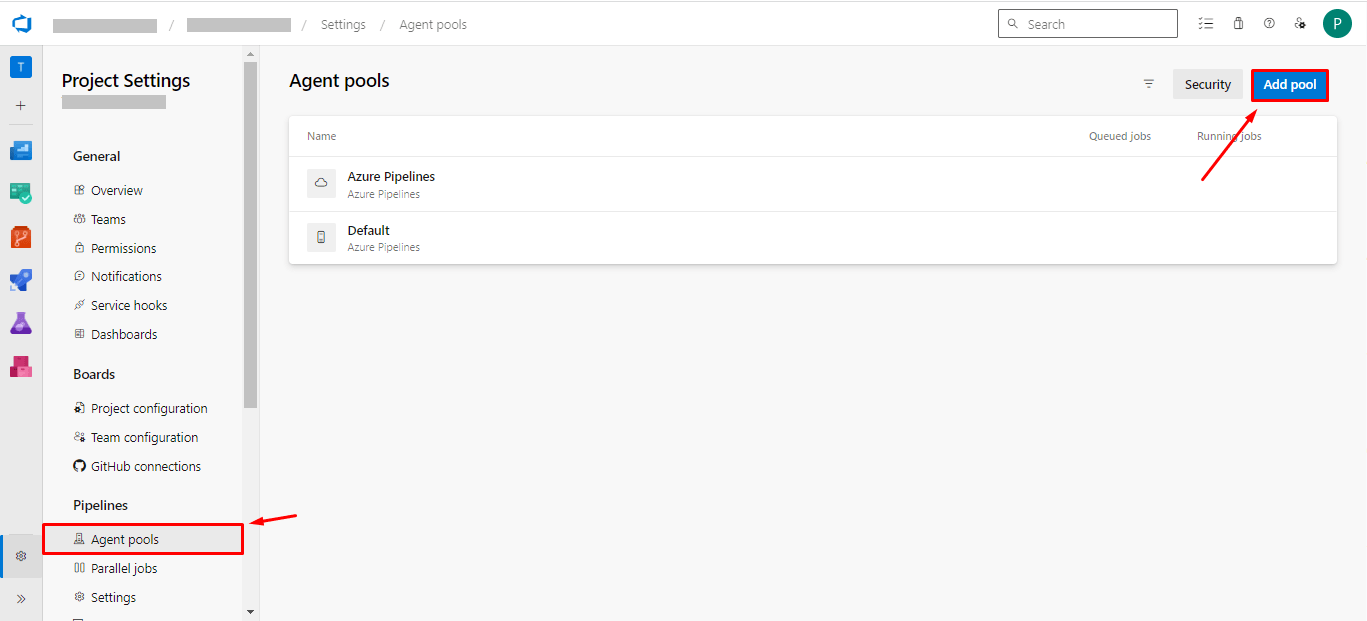
- Click the top right side “add pool”
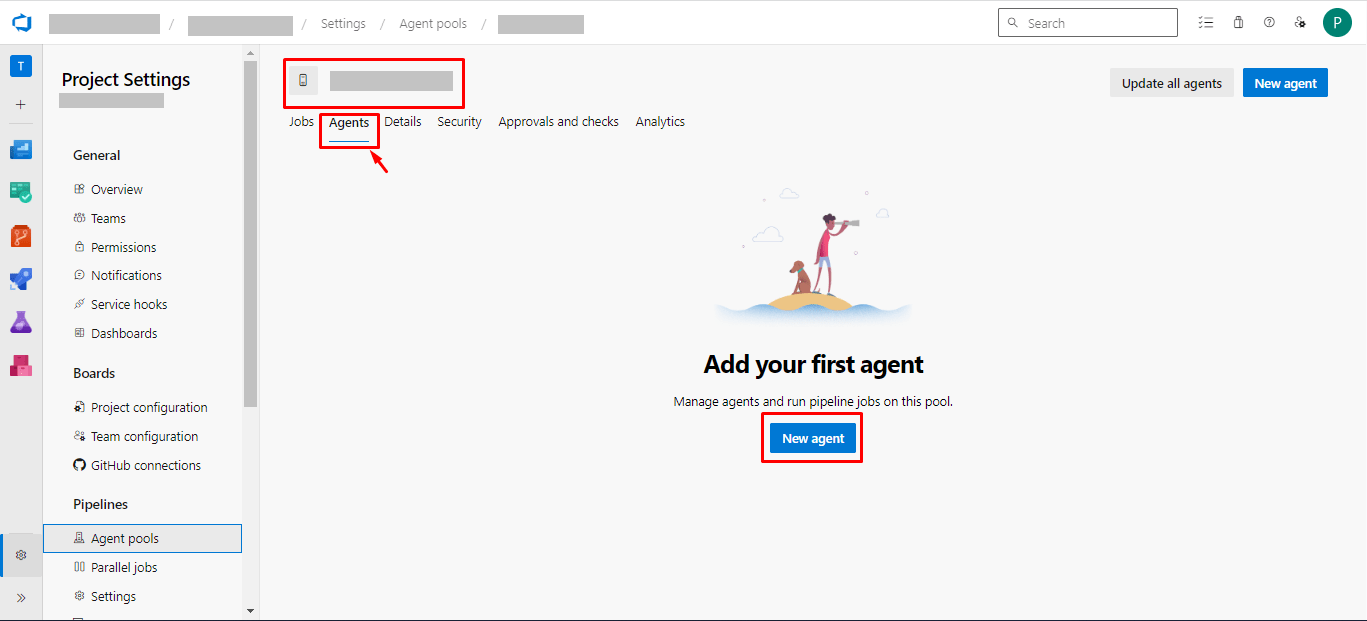
- STEP 3: After creating a pool go to that pool and click on agent and add a new agent.
- STEP 4: After clicking on a new agent select your operating system and it will define all steps.
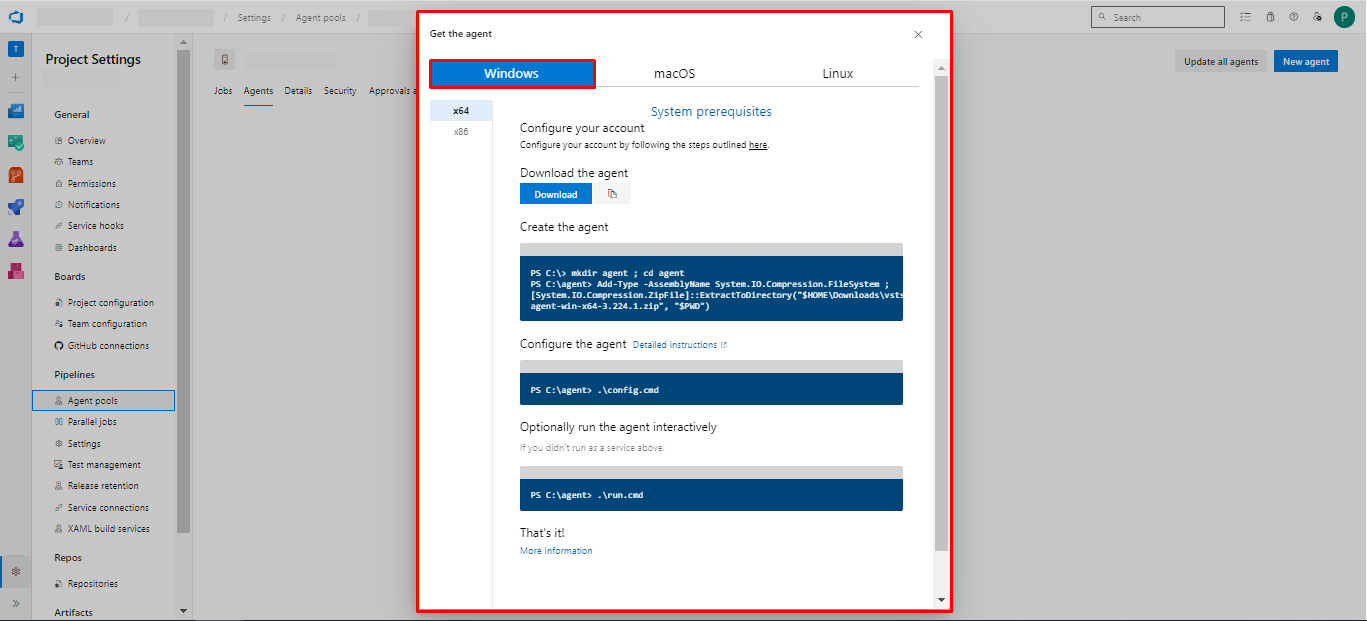
- STEP 5: For example, we have selected the Windows environment here. Follow the steps below.
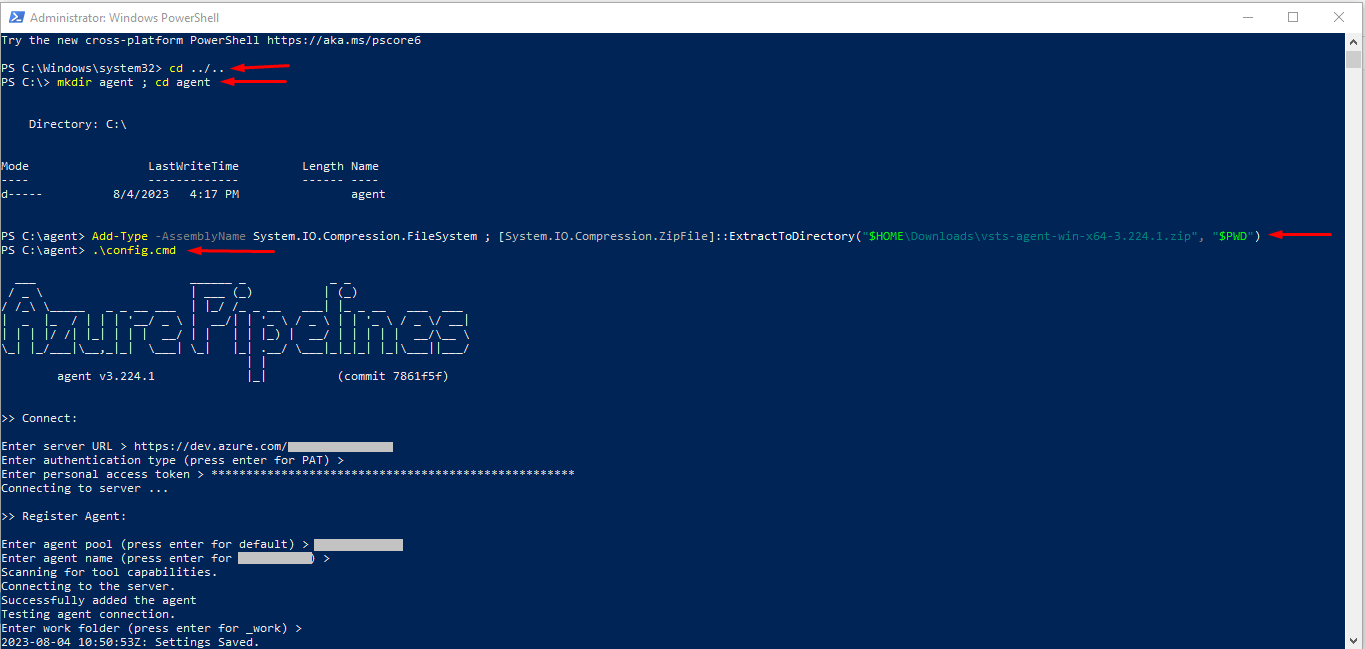
- STEP 6: Download agent file and run below command one by one in cmd (make sure you have run as administrator).
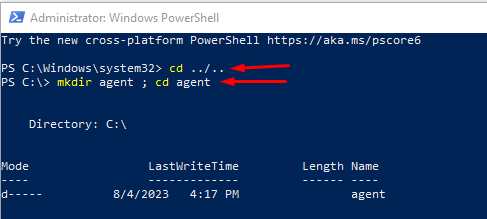
- Run the below command in your cmd or powershell by administrator step by step. The below image shows the expected output of the executed command.
mkdir agent
cd agent
Add-Type -AssemblyName System.IO.Compression.FileSystem ;
[System.IO.Compression.ZipFile]::ExtractToDirectory("$HOME\Downloads\vsts-agent-win-x64-3.224.1.zip", "$PWD")

.\config.cmd
- After Clicking this config command it will open a few questions while configuring.
.\run.cmd

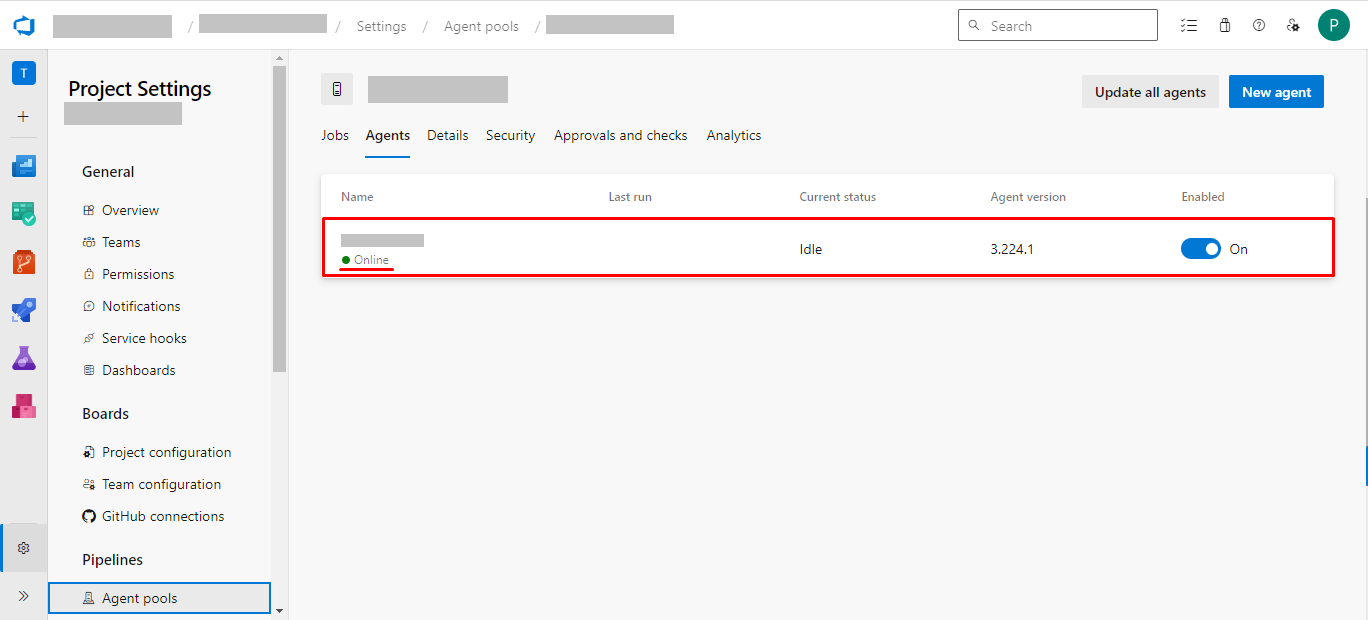
- Check the status of Agent if you have successfully connected then it’s shown online.
3. Setup Automation
For setup automation of deployments via Azure Pipelines, specify the agent pool containing the Windows agent in the pipeline configuration: In your Azure DevOps organization, when defining a pipeline (e.g., YAML-based or classic editor-based), you can specify the agent pool to use. Choose the agent pool that includes your Windows agent. And the diagram below shows some better explanations of automation.

Below are the steps to for automate the application development process
- STEP 1: Create a .YAML file and inside that YAML file define all the steps of CI and CD or if you want to do other steps you can define as well after creating the YAML file push your changes.
trigger:
 branches:
   include:
     - refs/heads/master
name: $(date:yyyyMMdd)$(rev:.r)
jobs:
- job: Job_1
  displayName: CI
  pool:
    name: Default
  steps:
  - checkout: self
    fetchDepth: 1
  - task: Docker@0
    displayName: Build an image
    inputs:
      containerregistrytype: Container Registry
      dockerRegistryEndpoint: becebc82-fd01-4509-99aa-65d624563a6b
      dockerFile: my-app/Dockerfile
      imageName: poonam1799/react-test:$(Build.BuildId)
      includeLatestTag: true
  - task: Docker@0
    displayName: Push an image
    inputs:
      containerregistrytype: Container Registry
      dockerRegistryEndpoint: becebc82-fd01-4509-99aa-65d624563a6b
      action: Push an image
      imageName: poonam1799/react-test:$(Build.BuildId)
      includeLatestTag: true
- job: Job_2
  displayName: CD
  dependsOn: Job_1
  pool:
    name: Default
  steps:
  - checkout: self
    fetchDepth: 1
  - task: CmdLine@2
    displayName: Run Docker Image - via CLI
    inputs:
      script: >
        docker rm react-ui -f


        docker run -it -d -p 3000:3000 --name react-ui
poonam1799/react-test:latest
Explanation of above YAML file:
The provided YAML script appears to be a configuration for a CI/CD (Continuous Integration/Continuous Deployment) pipeline using Azure Pipelines. This pipeline seems to automate the process of building a Docker image for a React application and pushing it to a container registry, and then potentially deploying the image to a Docker container for hosting the React application.
Here’s a breakdown of the different sections and what they do:
- Trigger Section: This section specifies when the pipeline should be triggered. It is set up to trigger the pipeline only when changes are made to the master branch.
- Name Section: The name of the pipeline is set to the current date in the format yyyyMMdd concatenated with the build ID in revision format.
- Jobs Section: This section defines two jobs, Job_1 and Job_2, that will be executed in sequence.
- Job_1: This job is responsible for building the Docker image of the React application and pushing it to a container registry.
- It checks out the source code from the repository.
- It uses the Docker@0 task to build the Docker image based on the Dockerfile located in the my-app directory. The built image will have the tag poonam1799/react-test:$(Build.BuildId) where $(Build.BuildId) is a dynamically generated identifier for the build.
- The built image is then pushed to the specified Docker registry using the Push an image action.
- Job_2: This job depends on the successful completion of Job_1 and is responsible for deploying the Docker image to a container.
- It checks out the source code from the repository.
- It uses the CmdLine@2 task to run a series of Docker commands:
- The first command removes any existing Docker container named react-ui.
- The second command runs a new Docker container named react-ui based on the previously built image (poonam1799/react-test:latest). The container is started in detached mode (-d) and maps port 3000 from the host to port 3000 in the container.
- Job_1: This job is responsible for building the Docker image of the React application and pushing it to a container registry.
In summary, this configuration sets up an Azure Pipelines CI/CD pipeline that builds a Docker image for a React application, pushes the image to a container registry, and then deploys the image to a Docker container for hosting the React application on port 3000. It uses Azure Pipelines’ built-in tasks and Docker commands to achieve this automation.
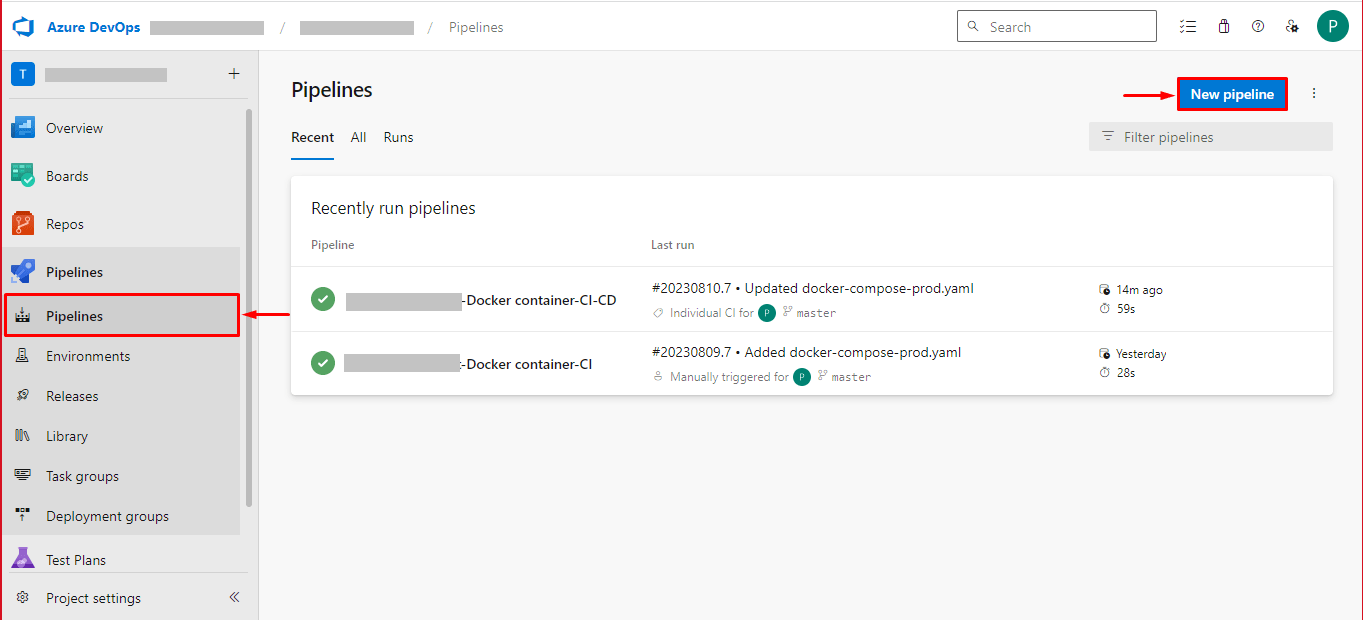
- STEP 2: Open Azure DevOps and go to the pipeline section and click on the new pipeline button.
- STEP 3: Use the classic editor and Connect your YAML file option.
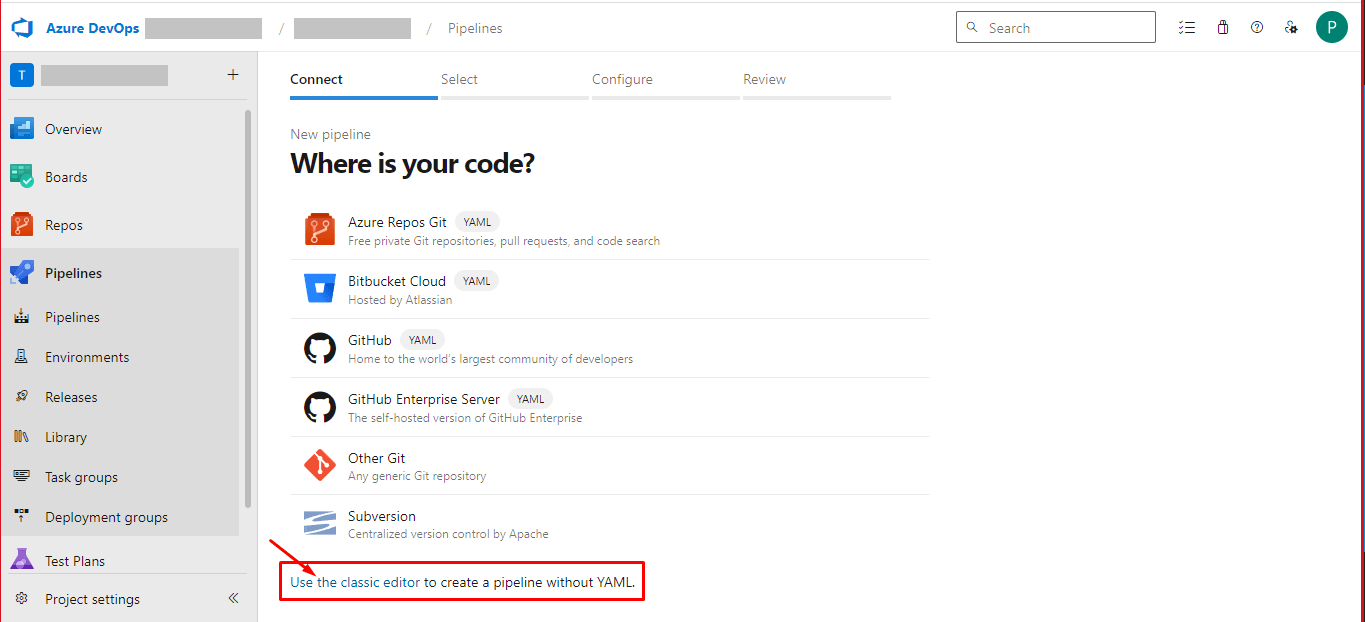
- STEP 4: Select your source repository, team project, repository, branch selection and configure your existing Azure Pipeline YAML file options and then, continue.
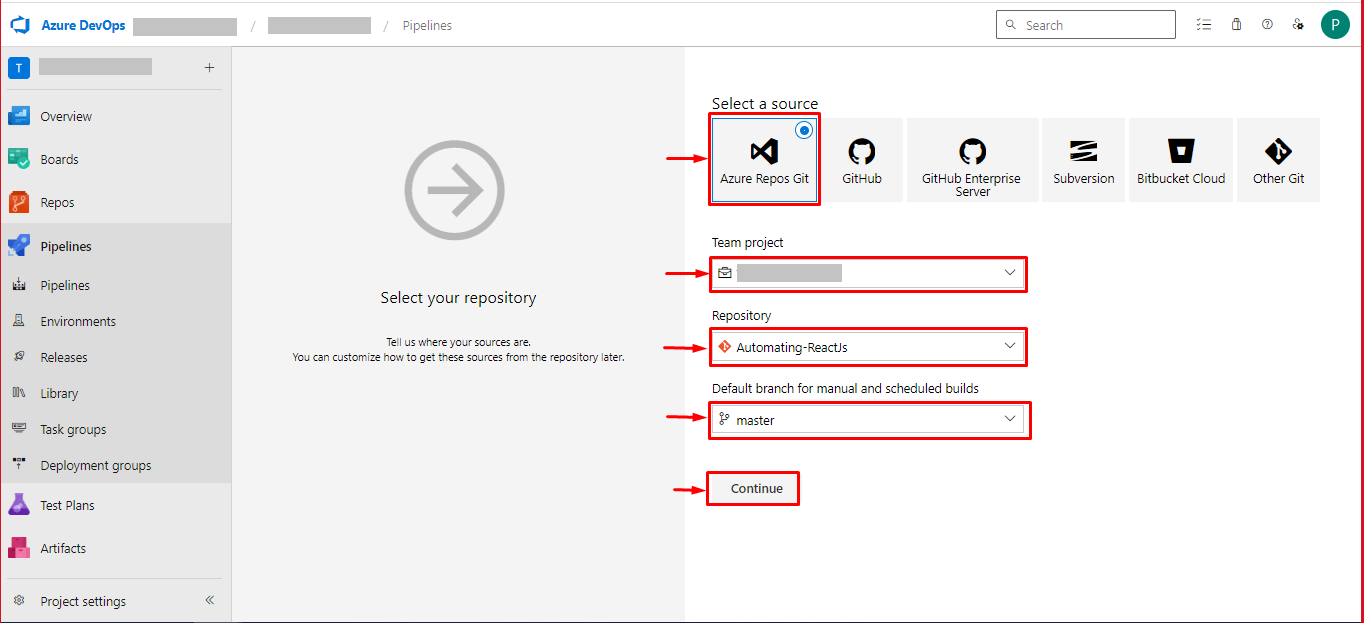
- STEP 5: Select your Branch and add a path for your YAML file.
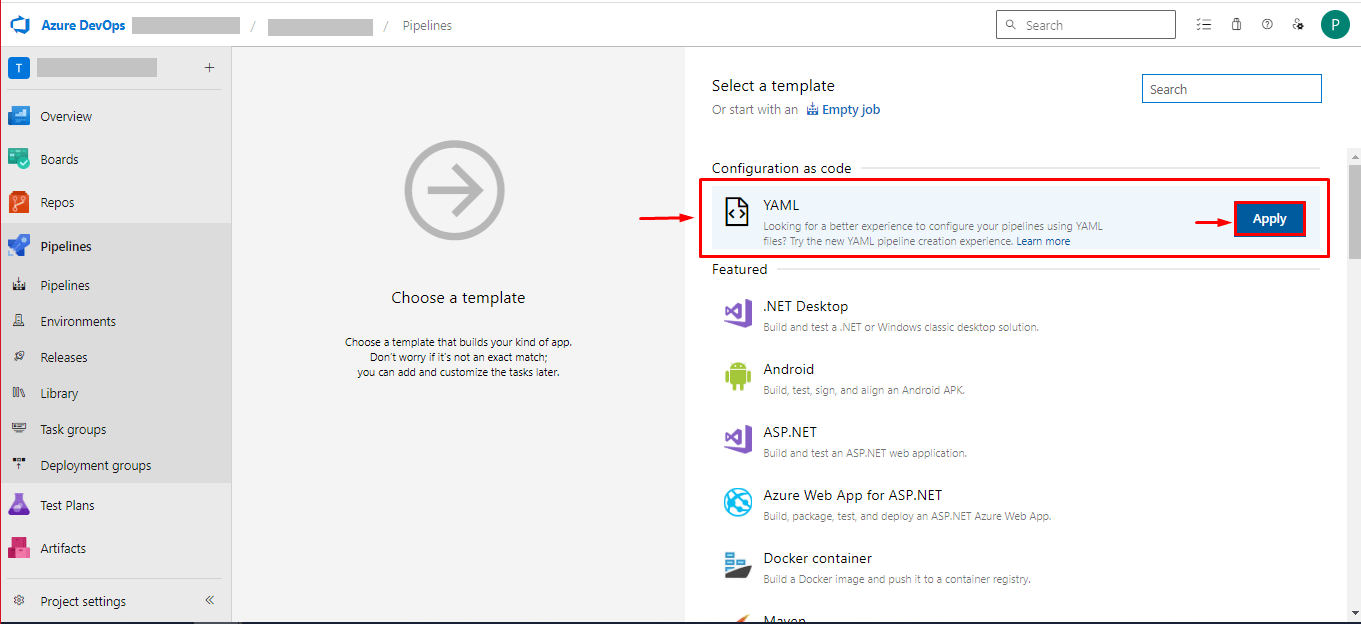
Once you have selected a YAML file, click on ‘Apply’. After this, you can find the next step to fill your default YAML file. Select the YAML file path from give file selection options and go to the next step.
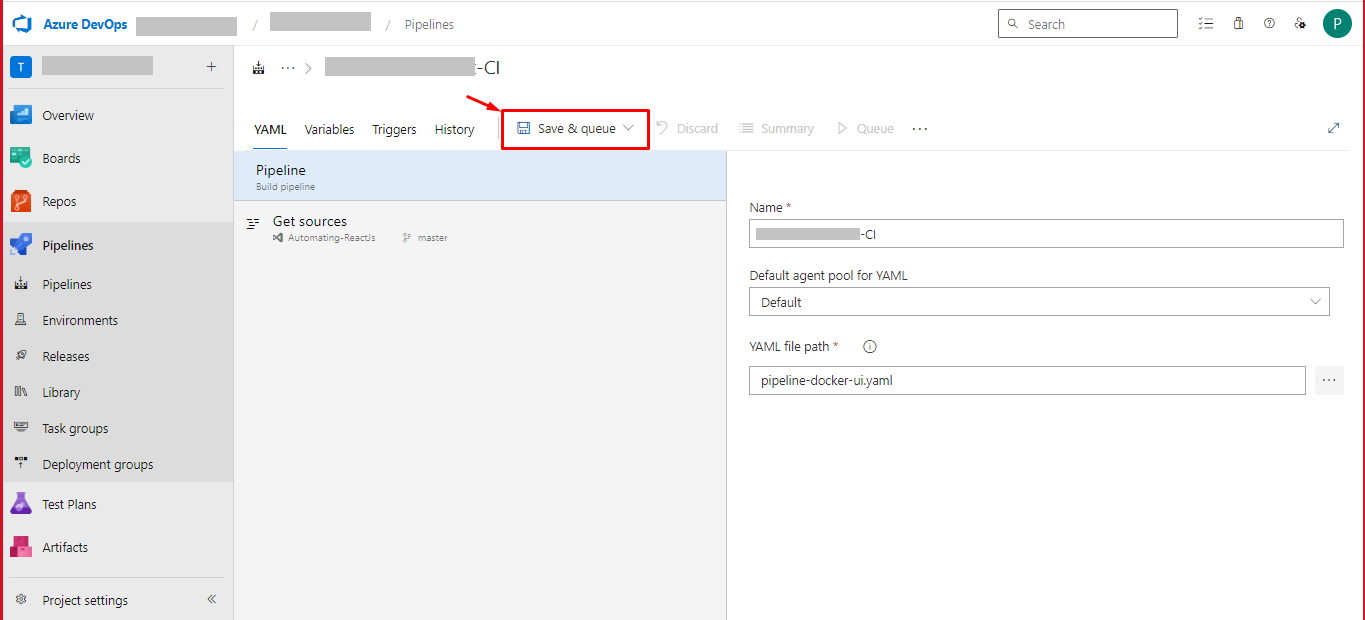
- STEP 6: After selecting your YAML file you can review your pipeline and save Your pipeline.
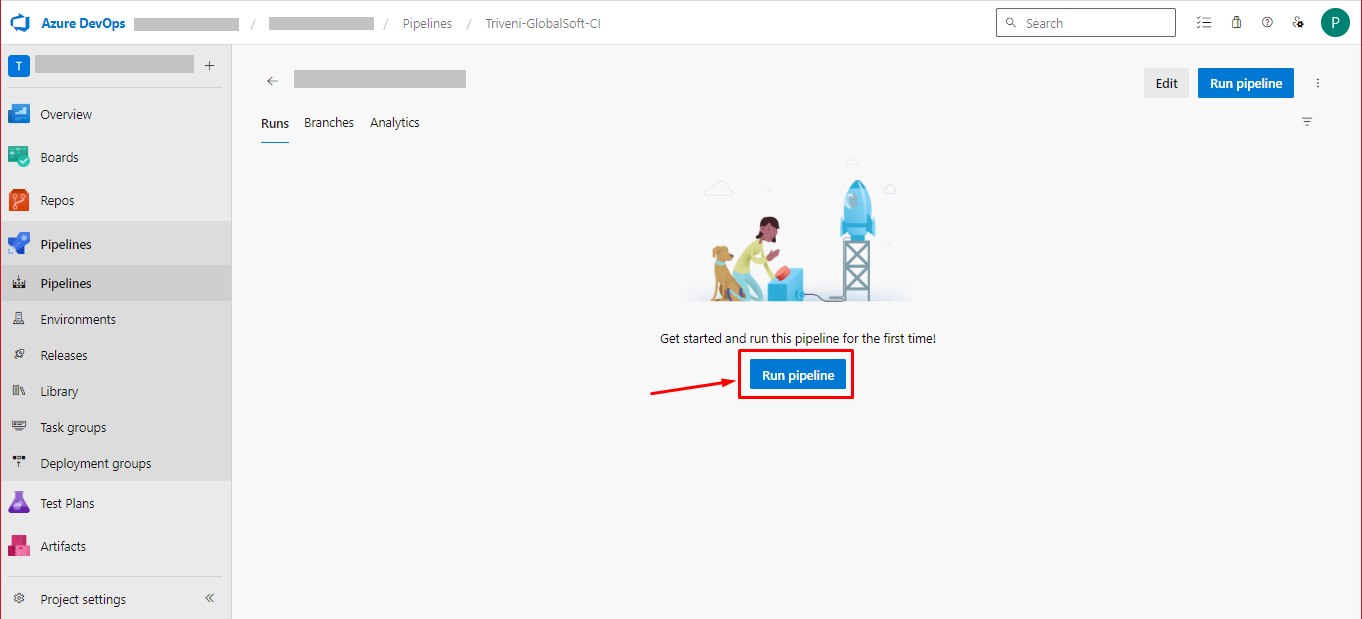
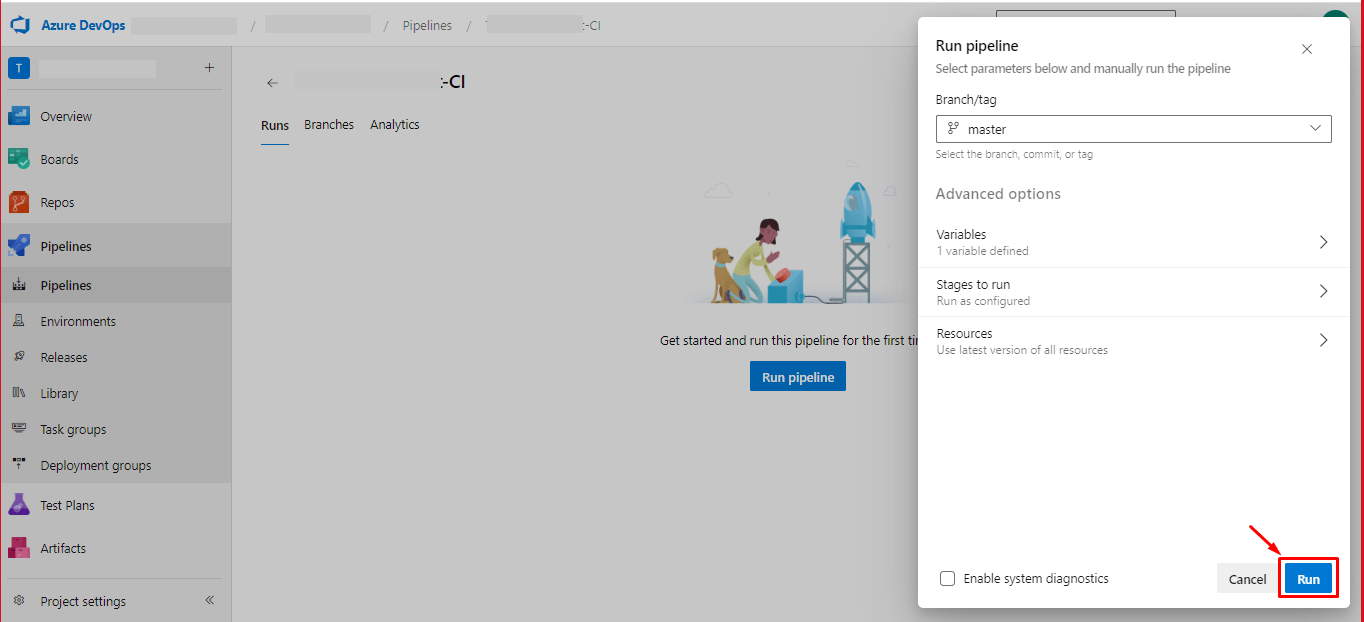
- STEP 7: After successfully saving the pipeline, you can manually run your pipeline and test your build and deployment.
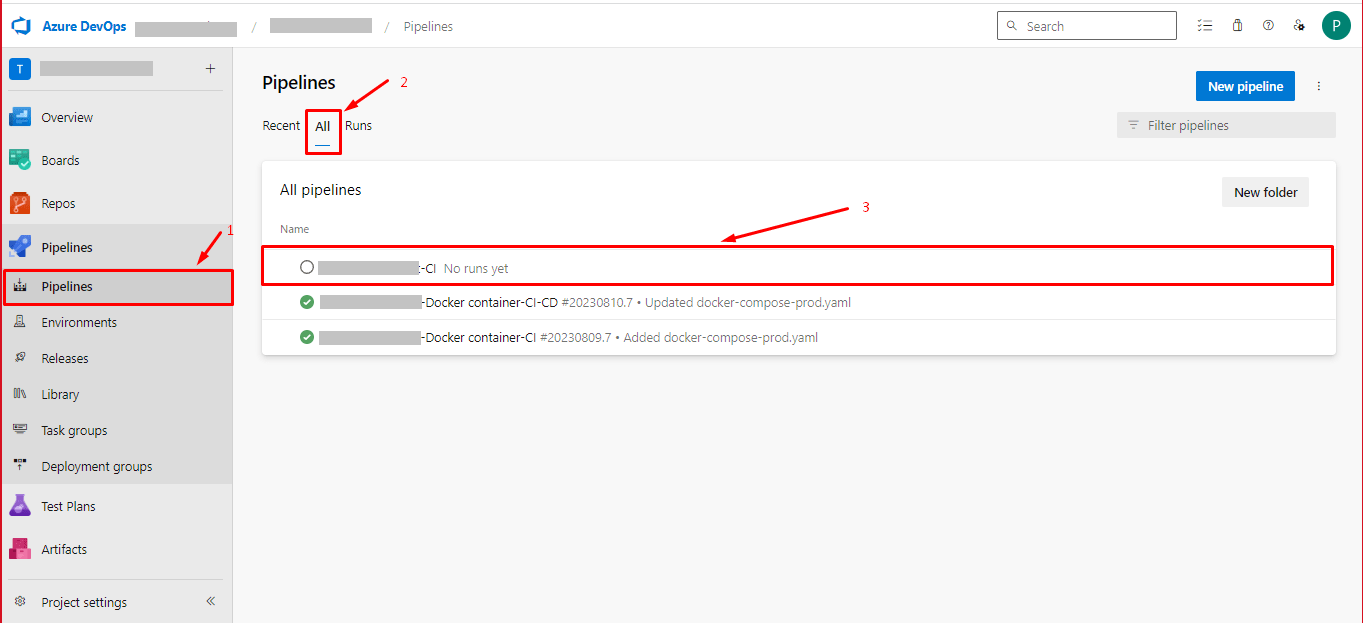
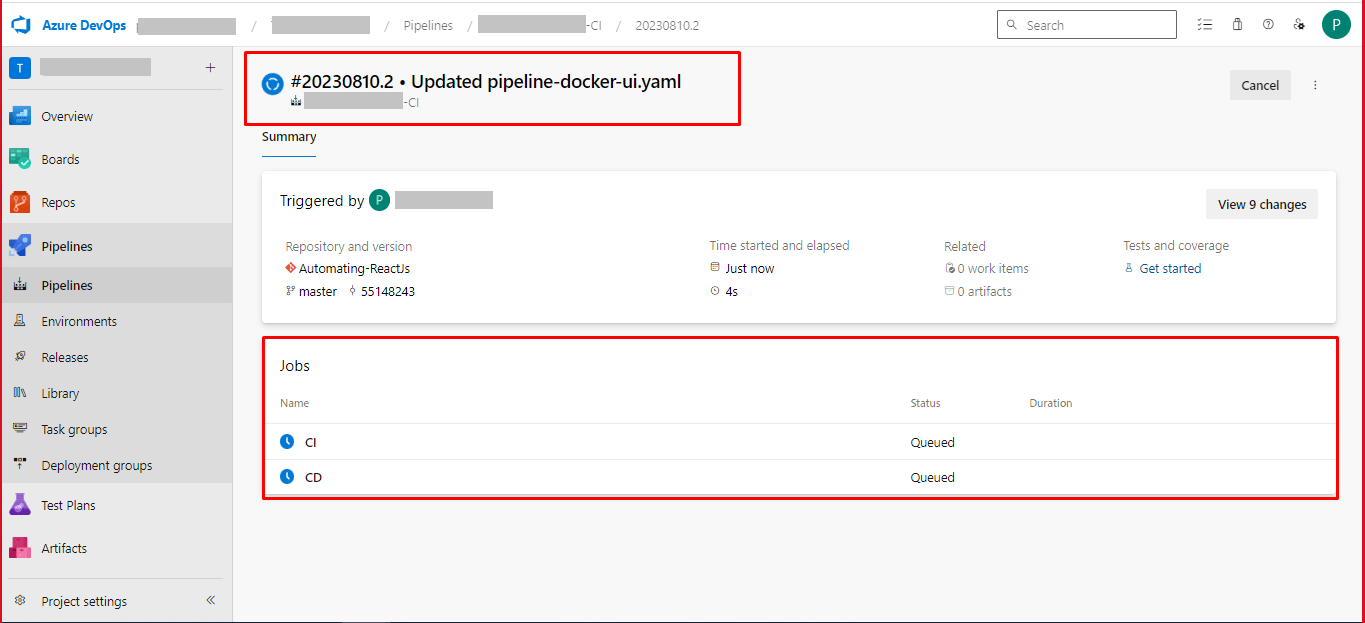
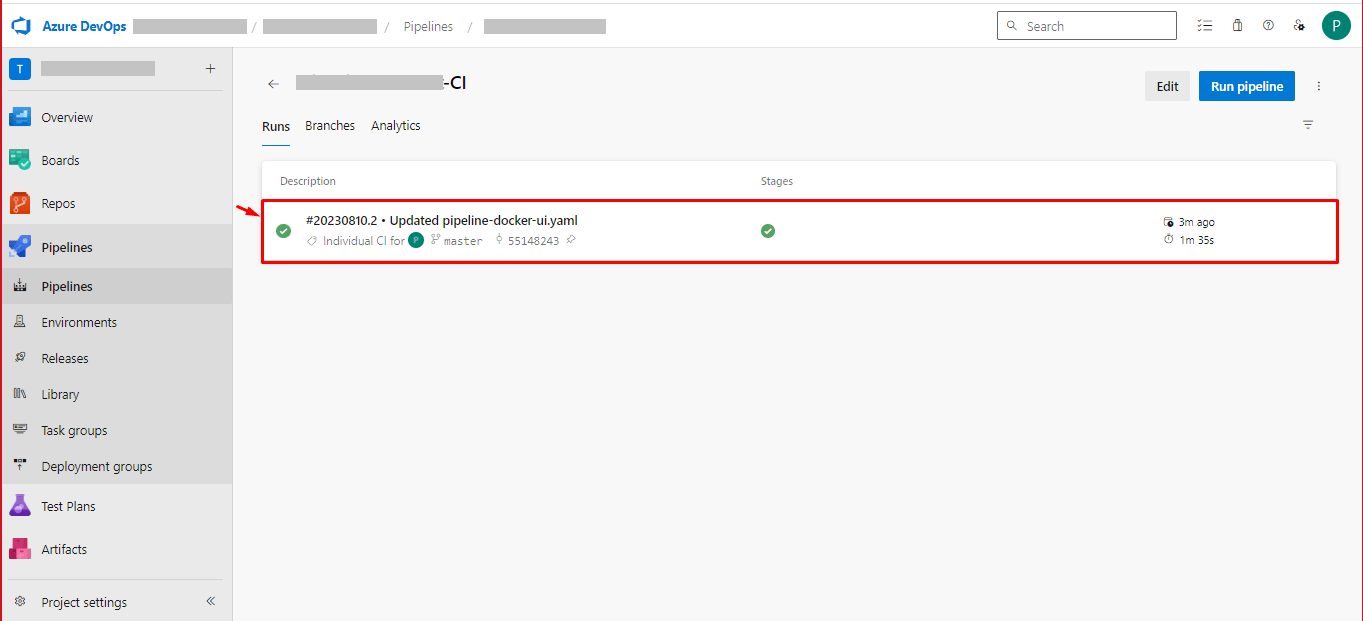
- NOTE: While running your pipeline for the first time, you may have an error related to permission of authorizations of resources. You may be given permission for the first time, then it should trigger automatically.
- Conclusion: After completing the above 3 steps, you can setup your automation deployments via azure devops pipeline, using azure agent for local development testing. For more details, you may go through the diagram below for better understanding.

Poonam Patel , Radhik Bhojani